

Can you get nail art that looks deliberate — not like a tutorial-fail screenshot — without spending $75 at a salon?
Most people who try handmade nail art quit after one session. The polish bleeds. The tiny brush skips. The stamper picks up half a design and leaves the rest on the plate. By day two, the whole thing chips at the corners and looks worse than bare nails.
The problem, in most cases, isn’t skill. It’s that they started with the wrong tools or skipped one non-negotiable step. Here’s how to build a handmade nail art practice that produces results worth keeping.
What Your Nail Art Toolkit Actually Needs
The toolkit determines whether handmade nail art works before you paint a single stroke. A discount-bin brush set will give you split bristles, inconsistent lines, and results that look exactly like what they cost.
Here’s what makes the difference — and why.
Brushes That Hold a Point
A nail art detail brush needs bristles that form a true, fine point. Most cheap brushes fan out after two uses, which makes controlled strokes impossible. The Maniology Detail Brush Set ($18) is consistently reliable because the liner brush maintains its tip through repeated use. That’s not something you can say about most brushes under $10.
For dotticure work, skip the toothpick. Dots come out uneven because a toothpick has no standardized tip. The Born Pretty Dotting Tool Set ($6 for five dual-ended tools) gives you five different sizes, which opens up significantly more design options than most beginners expect from a $6 purchase.
Fan brushes are optional for most handmade designs. They become useful specifically for ombre or gradient effects, where blending with a flat brush typically leaves visible streaks and costs extra time.
The Polish Consistency Problem
Regular nail polish works for basic handmade designs. For fine-line nail art, it’s often too thick — lines bleed and lose definition at the edges. Fix this with two drops of nail polish thinner (not remover — acetone degrades the formula). Seche Restore Thinner ($6) works with most standard polish brands and restores the original consistency without affecting color payoff.
Gel polish gives you more working time. Because gel doesn’t dry in open air — it only cures under UV light — you can rework a petal stroke or correct a smear before locking the design in. The Beetles Gel Polish Starter Kit ($39) includes a UV lamp, base coat, top coat, and eight polish shades. It’s the most complete beginner gel setup under $40 and eliminates the guesswork of buying a lamp separately and hoping the wattage matches the polish brand.
For freehand line work without a brush, Sally Hansen Nail Art Pens (around $7 each) function like a felt-tip marker. The color range is limited — typically 12–15 shades — but for geometric lines, thin outlines, and abstract marks, they outperform brushes for most beginners because the tip width is consistent from stroke to stroke.
Top Coat Is Not Optional
Skipping a quality top coat destroys handmade nail art faster than any technique error. Seche Vite Dry Fast Top Coat ($8) seals the design in under two minutes and extends wear considerably. The critical rule: apply it no earlier than 15 minutes after the last detail layer. Applied too early, it drags wet polish and smears everything underneath.
For gel users, the Beetles No-Wipe Gel Top Coat eliminates the tacky inhibition layer that most gel top coats leave. The finish looks cleaner and photographs significantly better.
Six Nail Art Styles Ranked by What They Actually Require
Different designs demand different tools and different levels of patience. Here’s an honest breakdown before you commit to a style:
| Style | Difficulty | Time per Hand | Primary Tool | Good First Project? |
|---|---|---|---|---|
| Dotticure | Beginner | 15–20 min | Dotting tool | Yes |
| Stamping | Beginner–Intermediate | 20–30 min | Stamp plate + scraper | Yes |
| Floral (hand-painted) | Intermediate | 30–45 min | Detail brush + dotting tool | After 2–3 sessions |
| Abstract line work | Beginner–Intermediate | 20–25 min | Nail art pen or liner brush | Yes |
| Ombre / gradient | Intermediate | 35–50 min | Makeup sponge or fan brush | No — practice first |
| Watercolor effect | Advanced | 45–60 min | Gel polish + isopropyl alcohol | No |
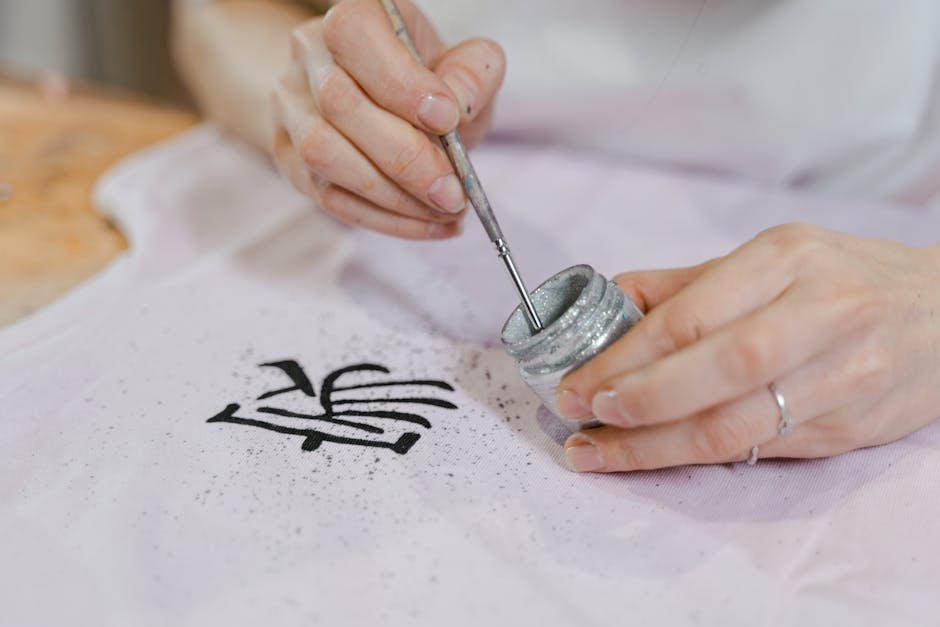
Stamping stands out as the most reliable technique for beginners who want consistent results quickly. Stamp plates are etched metal discs — you apply polish, scrape off the excess, pick up the design with a silicone stamper, then press it onto the nail in one motion. The result looks professional without requiring a steady freehand.
Dotticure and abstract line work are similarly forgiving. You can build a full set of handmade nail art looks using just those three techniques while you develop the freehand brush control needed for florals and gradients. Ombre and watercolor effects typically take three or four attempts before the results look intentional rather than muddy. That’s normal, not a sign something went wrong.
When Handmade Nail Art Is the Wrong Choice
3D acrylic designs, sculpted nail extensions, and encapsulated glitter builds require professional equipment and substantial practice to execute cleanly. A proper acrylic kit runs $150–200, and reliable technique takes months to develop. For any high-stakes event where the nails genuinely need to be flawless, a licensed nail technician at $50–80 is the better trade-off. Handmade nail art wins everywhere else: everyday wear, color experimentation, and any design that doesn’t involve sculpting or extension work.
How to Paint Floral Nail Art: A Step-by-Step Approach
Floral nail art is one of the most searched handmade styles — and for good reason. It reads as complex, but the underlying technique requires only two shapes: a dot and a short curved stroke. Here’s how to execute it without the result looking like fingerpainting.
Start with Base Coat and Background Color
Apply one thin base coat layer. For regular polish, wait 3–5 minutes. For gel, cure under UV for 60 seconds. The base coat gives your polish something to grip, which directly affects how long the handmade design lasts.
Apply two thin coats of background color. White and soft nude shades give floral designs the highest contrast and make the painted details visible from a distance. ILNP Mega ($11 per bottle) is a reliable cream formula with full opacity in two coats and minimal streaking, which matters when your flower petals will sit on top of it.
Place the Center Dots
Dip your dotting tool into a contrasting polish. Press five dots in a loose circular cluster — these become each flower center. Don’t fixate on perfect symmetry. Slight irregularity reads as organic, not messy. Space the clusters across the nail so no two flowers share dots or overlap awkwardly.
Paint the Petals
Load the detail brush with a contrasting or complementary shade. For each flower center, paint 5–7 small teardrop strokes radiating outward: press the tip down, then lift while pulling toward the nail edge. This single stroke technique is the foundation of most hand-painted floral designs.
Practice the stroke on paper before touching your nails. The pressure and lift motion needs to feel natural before you try it on a curved nail surface. One or two minutes of paper practice typically produces noticeably cleaner results on the actual nail.
Add Leaves, Then Seal
Between flowers, paint 2–3 small curved leaf strokes in green. Keep them small — they’re supporting detail, not focal points. After the leaves dry, press a small white dot onto the center of each flower cluster. That single highlight step elevates the finished look more than any other detail.
Wait at least 15 minutes before applying top coat. Apply in smooth strokes from base to tip without pressing down on the design — Seche Vite is aggressive enough to drag slightly wet polish if you apply pressure directly over a detailed area.
The Most Common Reasons Handmade Nail Art Fails
Why does the design smear even when it looks dry?
Polish forms a dry skin on the surface within minutes, but the layers underneath can stay wet for 30–60 minutes depending on coat thickness. Top coat applied too early traps that moisture and causes bubbling, drag marks, or surface wrinkling. Set a timer. Fifteen minutes minimum after the final design layer. For thick applications, 25 minutes is safer.
Why do stamping designs transfer incompletely?
Two causes. First, the stamping polish dried before you transferred it — you typically have 10–15 seconds between applying polish to the plate and picking it up with the stamper. After that window closes, it skins over and won’t transfer cleanly. Second, uneven pressure across the stamper leaves gaps in the design. Roll the stamper slightly as you press rather than pressing straight down. A clear-head stamper, like the Maniology ManiQ Stamper ($14), lets you see exactly where the design is landing and fixes alignment problems immediately.
Why does the design chip within two days?
Almost always a base coat or top coat issue, not the design itself. Without base coat, there’s no adhesion layer — the polish sits on the bare nail and lifts at the first flex. If top coat was applied too thin or skipped at the edges, the design lifts from the tip first. Run the top coat brush along the free edge of each nail — this capping step seals the most vulnerable point. Reapply top coat every 2–3 days to extend wear without redoing the full design.
The Best Starter Setup for Handmade Nail Art
The Beetles Gel Nail Kit paired with Maniology detail brushes is the most practical first setup under $60 total. That’s the clear recommendation for anyone starting from scratch.
The Beetles kit solves the lamp-compatibility problem that trips up most gel beginners — the UV lamp is calibrated for Beetles polish, so you’re not guessing whether the wattage matches the polish’s cure requirements. Eight colors, base coat, top coat, and the lamp come in one purchase. Add the Maniology brushes for the fine line work the kit’s standard applicators can’t manage.
A Born Pretty Dotting Tool Set ($6) rounds out the setup. With those three purchases, you have the tools to execute dotticure, stamping, and hand-painted florals — three distinctly different handmade styles from a single investment.
If gel isn’t something you want to commit to yet, start with regular polish and the Sally Hansen Nail Art Pens. Total cost is under $25, no lamp required, no cure time to manage. The tradeoff is longevity: regular polish typically starts chipping by day 4–5, even with good prep, compared to 10–14 days for well-applied gel. For building technique and experimenting with designs before committing to a full gel setup, that’s a reasonable starting point.
Advanced Handmade Techniques Worth Trying After the Basics
After several sessions of floral work and dotticure, two techniques expand what’s achievable at home without buying additional major equipment.
Watercolor Effect with Gel and Isopropyl Alcohol
Apply white gel base and cure it fully. Then apply a thin, uncured layer of gel top coat over the surface. Drop small amounts of gel polish onto the uncured layer using a brush — then use a second brush dampened with 70% isopropyl alcohol to spread and dilute the color. The alcohol disperses the pigment in translucent washes across the surface. Cure after 30–40 seconds of manipulation.
No two nails come out identically, and that variation is the point of the style. ILNP Ultra Holo polishes ($11 each) disperse cleanly in uncured gel and add a multidimensional shimmer that flat polishes can’t replicate in this technique.
Negative Space Line Work
Negative space designs treat the bare nail surface as a deliberate design element. Apply a sheer or nude base, then paint geometric lines or irregular abstract marks using a nail art pen — leaving sections of the nail intentionally uncovered. The contrast between the bare nail and the painted lines creates the design without requiring complex freehand skill.
Sally Hansen Nail Art Pens handle this style well. The 0.5mm tip is consistent from stroke to stroke, and light pressure produces thinner lines while heavier pressure widens them. The only requirement is a clear plan before you start — sketching the line placement on paper first typically saves more time than it costs.
The question that opened this — whether handmade nail art at home can produce results worth the effort — has a direct answer. For the majority of popular styles, yes. The ceiling isn’t skill. It’s typically the tools. A brush that holds a point, polish at the right consistency, and a top coat applied at the right time close most of the gap between a home design and a salon result.
